Settings menu
Settings Menu sections include:
• DJI account settings;
• DJI Drone;
• Camera;
• Live stream;
• Maps;
• App Settings;
• About;

DJI account settings
Displays DJI authentication status.
DJI Drone
Displays information about connected drone: type, serial number and firmware version.
Simulator
Allows to turn on the Simulator.

Drone Specific Settings:
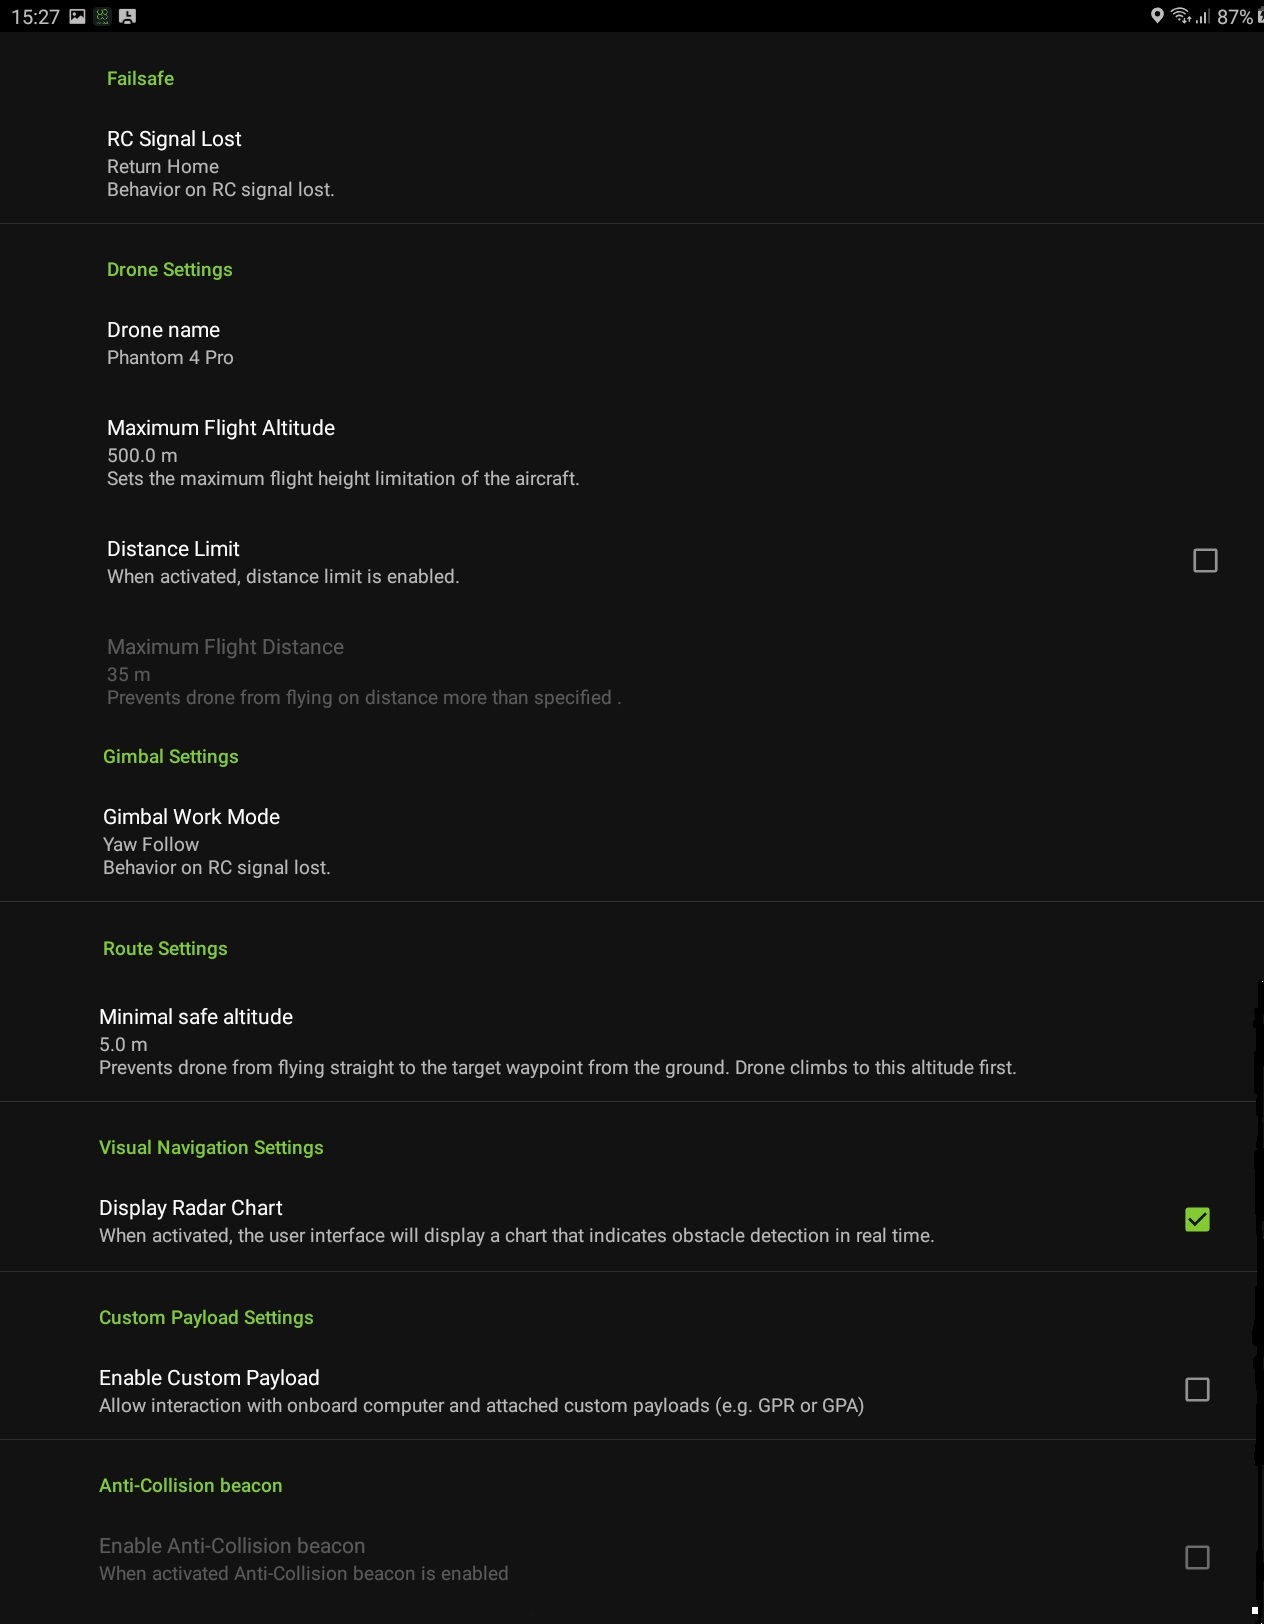
• Failsafe - allows setting the behavior for Failsafe situations.
• Drone name – specify drone name.
• Distance limit - enables to set the limit of the maximum flight distance.
• Maximum flight altitude – shows the maximum flight altitude for the vehicle
• Gimbal work mode - allows to choose one of the values: Free, FPV or Yaw Follow.
• Minimal safe altitude is a value that prevents from flying straight to the target waypoint from the ground. Drone climbs to this altitude first.
• Display Radar Chart - indicates obstacles in real time.
• Enable Custom Payload - allows interaction with custom payloads.
• Anti-collision beacon – enables beacon lights
DJI RTK Network Service settings:

• Enable RTK – When activated, the application initiates communication to a third-party RTK network server.
• RTK source – Allows choosing RTK source settings
• Connecting DJI P4RTK or DJI P4Multispectral with DJI D-RTK2 base in UgCS for DJI
https://wiki.ugcs.com/How_to_connect_DJI_P4RTK_or_DJI_P4Multispectral_with_DJI_D-RTK2_base_in_UgCS_for_DJI
• Connecting DJI M300RTK with DJI D-RTK2 base in UgCS for DJI
https://wiki.ugcs.com/How_to_connect_DJI_M300RTK_with_DJI_D-RTK2_base_in_UgCS_for_DJI
Enable PPK mode (*Only supported for Phantom 4 RTK)

Once enabled, for each flight a folder will be created on the SD card for storing recorded PPK data and images taken during the flight. For PPK data to be recorded, the SD card must be inserted and camera has to be set to photo mode.
Note that the SD card cannot be formatted while PPK mode is enabled.
Camera
Enable camera preview:
Enables or disables video streaming in the main view. *Video streaming function is only available for UgCS for Command & Control. More details can be found here.
Zoom measurement units:
Enables to change zoom measurement units to millimeters or zoom scale
Airlink settings:
Displays advanced Wi-Fi Link settings: Video input, Video output and Data channel.
• Video Input:
-
Enable External Video Input Port - to enable/disable Lightbridge 2 dual encode mode.
-
Bandwidth Allocation For LB Video Input.
• Video Output:
Enable secondary video output on Remote Controller. By default, Remote Controller outputs video to Mobile Device. User is able to enable/disable a secondary video stream to one of Remote Controller's physical HDMI or SDI ports. *Video streaming function is only available for UgCS for Command & Control. More details can be found here.
-
Secondary video output port - to choose Remote Controller’s HDMI or SDI port for secondary video output.
-
HDMI video output format - to set resolution and frame rate.
-
SDI video output format - to set resolution and frame rate.
• Data Channel:
-
Transmission Mode - to set FPV video high quality vs low latency preference. This mode only effects FPV camera, not camera on HD Gimbal.
-
Channel Selection Mode - Auto/Custom.
Sets downlink channel selection mode (manual or automatic) for wireless link.
-
Data Rate - Sets the downlink data rate (throughput). Higher data rates increase the quality of video transmission, but can only be used at shorter ranges.
-
Airlink Frequency - The frequency bands for Lightbridge 2.4 GHz / 5.7 GHz / 5.8 GHz.
Sets the LB air link frequency band. It is only supported by Inspire 2 and Phantom 4 Pro. For the other products with LB air link, the frequency band is always 2.4 GHz.
Invert gimbal gesture control
Allows choosing direct or reverse gimbal control.
Gimbal's Rotation Speed – Optical Zoom Level Coefficient
Slows down the rotation speed of the gimbal when increasing camera optical zoom, range is [1, 100]. For example, coefficient is 10 and camera optical zoom is set to maximal value, gimbal rotation speed will be reduced 10 times.
Live Stream Provider *Video streaming function is only available for UgCS for Command & Control. More details can be found at https://ccs.ugcs.com/
Allows choosing a stream provider: no stream, UgCS stream or RTSP stream.
Live Stream Provider Preferences
Allows configuring the settings of the chosen stream provider. More information can be found in UgCS User manual's section "Video display and recording" and "Configure connection to the Video stream". UgCS desktop video is always displayed with aspect ratio 3:4.
DJI Transcoding
Allows changing transcoding method and bitrate.
-
Use DJI Transcoding. Auto – allows DJI to transcode the stream. Enabled - phone or tablet will transcode the stream. Disabled – transcoding is disabled.
-
Data rate, Mbps. Slider allows increasing or decreasing the stream bitrate in order to change the stream performance and quality.

Placemark settings
Allows creating placemarks during photoshoot
-
Make a placemark on photo – enabling this option will put a placemark on the map from where the photo were taken
-
Placemark layer – choose the layer of the map, placemark needs to be assigned to
-
Upload timeout, s – determines, how much time, the program is ready to wait uploading photo, before rejecting it. Default is 30 seconds.
Map Provider
Allows choosing a map: no map, Google map or Geoserver map.
Map Provider Preferences
Allows configuring a chosen map, choosing between satellite, normal, hybrid or terrain.
Enable Map Rotation
Allows map rotation.
App Settings
Interface
User Interface field allows changing user preferences settings, for example - Localization setting: Select the unit system to use throughout the app.
Advanced
Advanced field allows configuring application settings, which are necessary for normal functionality of application, it includes:
• Enable/Disable SSDP for automatic searching of UgCS desktop application in local network,
• Enable UgCS direct connection, UgCS server direct host, UgCS server direct port,
• Enable/Disable UgCS Bluetooth connection,
• Enable/Disable Joystick Control,
• Open logs directory access,
• Enable/Disable Advanced telemetry view.
Experimental features
• UgCS Transcoding – allows changing bitrate, scale, frame limit manually.

• Smart Oblique Capture
The feature allows photos to be taken at multiple angles during a flight by way of payload control. During a Smart Oblique Capture operation, the aircraft will fly in the mode with the highest operational efficiency. The flying speed will also be adjusted according to the different oblique capture sequence for each flight path section, to maximize the efficiency of the operation. Currently, the function is only supported by Zenmuse P1 as mounted on the M300 RTK. Without that feature, the camera orientation during the mission can be controlled at Waypoints only.
However, sometimes it is required to capture multiple photos at different angles. For instance, it can be used during photo-mapping.
Application uses gimbal to control rotation of the camera during the flight, so the camera is looping between three points: orientating Nadir, left side and right side:

This rotation is spread evenly among time set in TRIGGER_BY_TIME action:

For instance, if time trigger is set to 3 seconds, shots will be taken every second (1 second for rotation at each angle).
The angle at which camera will rotate can be set as ‘Angle’ setting:

! Note! Smart Oblique Capture is supported for camera trigger by time only. Enabling or disabling that feature or changing angle require mission re-upload.
• Required hardware:
DJI M300 drone + P1 camera.
In order to turn on the Smart Oblique feature, in App Settings go to “Experimental Features” section, select “Smart Oblique Capture”, enable Smart Oblique capture.


Version
Displays current version of the UgCS for DJI application.
Network
Displays current network information.
UCS connection port
Displays port, which is currently selected.
Updated 10 months ago